Thursday, May 10, 2018

Final Project: Invisible Camera Self Portrait

Hello Students,
Your next photo challenge is to replicate the effect in the photo below. The concept is to create a self portrait, taken in a mirror, where the camera is hidden through photoshop trickery. I loved this technique so much that years ago I emailed Josh Dunlop and asked his permission to use his photo below and challenge my students to replicate his method, fortunately for us he loved the idea.

This high performing student example shows good technical skill and attention paid to lighting and exposure

Assignment:
Check out the attached images... how do you think it was created? Follow this link and try to replicate the process. With some additional searching you can find more resources on the steps required to replicate the effect.

Tips:
  • Follow the steps on the expert photography website to create your own invisible camera self portrait
  • Take a few practice shots against the mirror to make sure you are exposed properly and in focus
  • Lock down focus/white balance/iso/shutter speed so your shots can be blended together in photoshop
  • Think about how you can use creative photography methods to make your own "hidden camera portrait" unique...  think about color, setting, attire, extras (other people), mood, lighting, color or b&w, image enhancement, etc...
  • Read and study the methods used, if your first attempts aren't successful, try again...

Photo by Josh Dunlop at ExpertPhotography.com

Student Examples:


Have fun!

 - Mr.W

Thursday, April 12, 2018

History of Photography Assignment

Assignment: History Of Photography Presentation
Students, your new assignment is a research and presentation project focusing on the history of photography and it's role in world history. You will create a slideshow presentation with written notes and give a 5 minute presentation about photography and it's role in history, from technological advances, to social issues and how the camera has become a tool for change in public perception. 

This is an illustration of a camera obscura from the 17th century. Origin: unknown, possibly Italian -  Library of Congress.
In class we will begin with a fun exercise by creating our own camera by hand and create a gallery of images with it (hopefully). The camera obscura (shown above) is an optical device that lead to the development of photography. Light from an external scene passes through a small pinhole and hits a surface reproducing the the scene upside down. The image can be projected onto paper and an image can be traced. Did you know you can visit a giant camera obscura in San Francisco?
This is a photograph of child laborers working in a mine from 1910. Images like these were taken by Lewis Hines for the National Child Labor Committee and helped to change public perception about child labor which assisted in enacting laws to protect children from exploitation, such as the Child Labor Amendment in 1924. Image source: Shorpy.com


Build Your Own Camera:
For this project you are tasked with building your own camera with cardboard, tape, old lenses and our scanner. Work in teams and experiment, trouble shoot and work out an effective process for creating imagery with a scanner. One portrait of each team member must be uploaded to the Flickr page for credit...

Tasks:
  1. Create a scanner camera using materials in the classroom
  2. Work in teams to build, refine, modify and create portraits of each team member with your scanner camera.
  3. Crop and refine each image in Photoshop, then upload to our Flickr group.
History of Photography Assignment Details:
For this project you are asked to research using the library as well as online resources to identify key moments in history that are relevant to photography. Focus on technology and its advances, uses, historical events and social causes that were affected by the use of photography. Identify 2 or 3 important photographers through history and discuss why their work is important. Create a google slide show, share it with your instructor and be prepared to present to the class the following week.

Tasks:
  1. Produce a slideshow with 20 images that cover a timeline of events in the history of photography and be prepared to give a 5 minute presentation.
  2. Cover everything from the earliest uses to technological advances and how photography has been used for social change, mentioning important photographers throughout history as well. Or focus on a certain time period, photographer or event for your project. Get approval from your instructor before proceeding.
  3. Include 2 of your own photographs and discuss how they are historically relevant and identify how they fit into a cultural context.
  4. Write 2-3 sentences of information for each slide and use those notes during your 5 minute presentation.
Have fun!

- Mr.W

Thursday, March 22, 2018

Rule Of Thirds Field Mission

Hello Students,
Your new assignment is a field mission utilizing the rule of thirds. Details are below.

Rule Of Thirds Field Mission:
Create 10 Photographs using the rule of thirds. You must properly compose, expose and capture pictures of the following subjects:

Subject Specifications:
  1. A person facing the camera, portrait closeup
  2. 2 people framed in the camera
  3. A group of 3 or more people
  4. A closeup image of someones hand/hands doing something (drawing, digging, making)
  5. A still life of found objects
  6. A landscape view
  7. A tree, flower or other natural element
  8. An architectural element
  9. Something shiny and new
  10. Something old and decayed
Assignment Specifications:
  • Shoot at least 10 images of each subject to obtain the best composition, exposure and quality. Post the best version of each.
  • You may shoot with any mode as long as your image is exposed correctly.
  • Using Photoshop, crop your photos appropriately if you need to.
  • Choose 3 of your best images and overlay a rule of thirds grid on top. Use the line tool or pencil tool to draw the simple grid. Screenshot and add your EXIF data of each final image to confirm manual mode.

To See A Rule Of Thirds Grid in Photoshop:
  1. View > Show > Grid
  2. Go to Photoshop > Preferences > Guides, Grids and Slices
  3. Set: Gridline to 33.3333 Percent
  4. Set: Subdivisions to 1
  5. This will show the grid, you will need to "draw" the grid on your image is with the line/pencil/brush tool and use as color that will show up against your image with good contrast.
  6. Save an alternate version of your file so you have 3 examples with and without the R.O.T. grid.

Student Work Examples:


Have fun! - Mr.W

Thursday, March 8, 2018

New Assignment: Photography and the Law

Hello Students,
In our modern era, photographers and their rights are constantly being challenged, abused and misled. It is important to know your rights and what means are available to protect you, your intellectual property, equipment and ownership of the images you create and to protect your individual rights under the law.

What are your rights as a photographer?
These are general guidelines regarding the right to make photos and should not be interpreted as legal advice. If you need legal help, please contact a lawyer.
  1. You can make a photograph of anything and anyone on any public property, except where a specific law prohibits it. e.g. streets, sidewalks, town squares, parks, government buildings open to the public, and public libraries. 
  2. You may shoot on private property if it is open to the public, but you are obligated to stop if the owner requests it. e.g. malls, retail stores, restaurants, banks, and office building lobbies. 
  3. Private property owners can prevent photography ON their property, but not photography OF their property from a public location. 
  4. Anyone can be photographed without consent when they are in a public place unless there is a reasonable expectation of privacy. e.g. private homes, restrooms, dressing rooms, medical facilities, and phone booths. Despite common misconceptions, the following subjects are almost always permissible: accidents, fire scenes, criminal activities, children, celebrities, law enforcement officers, bridges, infrastructure, transportation facilities, residential, commercial, and industrial buildings 
  5. Security is rarely an acceptable reason for restricting photography. Photographing from a public place cannot infringe on trade secrets, nor is it terrorist activity. 
  6. Private parties cannot detain you against your will unless a serious crime was committed in their presence. Those that do so may be subject to criminal and civil charges. 
  7. It is a crime for someone to threaten injury, detention, confiscation, or arrest because you are making photographs. 
  8. You are not obligated to provide your identity or reason for photographing unless questioned by a law enforcement officer and state law requires it. 
  9. Private parties have no right to confiscate your equipment without a court order. Even law enforcement officers must obtain one unless making an arrest. No one can force you to delete photos you have made. 

Case Study: Obama Image Copyright Case
Mannie Garcia, Associated Press, Shephard Fairy
Mannie Garcia is a photographer that worked for Associated Press (AP) and took this iconic photo of President Barack Obama, which was then converted into a digital artwork by the artist Shephard Fairy. AP claims that Shephard Fairy violated their copyright of the image. Mr. Fairy claims that by altering the photograph he had created an original artwork. Mannie Garcia even joined in claiming that he owned the original rights to the photograph and it became a 3-way legal battle. All parties eventually conceded and came to an out of court settlement and agreement, with no parties admitting to copyright having been infringed. What do you think? Did Mr.Fairy violate the copy rights of the original photo? Who owns the rights in the first place? AP or Mr. Garcia?

Case Study: Colorado University Independent vs Photographer Andy Duann
Photo by: Andy Duann
When student photographer Andy Duann heard there was a bear stuck in tree on the CU campus he did what any crack photographer would do, he got to the scene just in time to take this photo. The image quickly went viral and was used in print by the universities student paper, the Colorado University  Independent newspaper. CUI then sold the image to major newspapers. When the photographer argued that he owned the original image the case seemed ready to be argued in court. Fortunately CUI recanted, AP pulled the image from its publications and Andy Duann's rights to the image were restored. This was a relatively quick copyright skirmish, but garnered national attention because of the viral nature to the image. What do you think? Was Andy Duann working as a photographer for CUI? Who do you think owns the rights?

Photography and the Law - Assignment Details:

  • Use the internet to research issues pertaining to photographers rights and/or copyright infringement issues and cases
  • Find one issue or case to write about that you find interesting
  • Write a 1 page paper outlining the issues in question, evidence, arguements, examples, images and outcomes. Was the issue/case settled? If so, how? Do you agree or disagree with the outcome? Why?
  • When complete, be prepared to present your issue, information and arguements to the class. Please provide examples of the photographs in question if possible.

Have fun!
  - Mr.W

Thursday, March 1, 2018

Final: Creating A Photo Series Essay

Hello Students,
Creating a photo series/essay is an exercise that can happen spontaneously or deliberately. It is a process that can take days, weeks, years. Your newest assignment is to create a photo series as a final project and present it in photo essay format to the class during finals week.

What is a Photo Essay?
The goal with a photo essay is to use a series of images to invoke an emotional response in the viewer. This is achieved through using photography to tell a story and present them with captions or full written text, such as an article that may appear in a website or print publication. Images can be presented sequentially or non-sequentially, the goal is to connect your images with a story and draw out an emotion from the viewer... such as anger, joy, fear, empathy, etc. For your final project you will create a photo essay about a social cause or issue of your choice, with a script to be read during presentation (although format for presentation is open to interpretation). The number of social issues that could be covered are numerous, find one that resonates with you to create a deeper connection with the story.

What is a Photo Series?
Most photo series will have a continual theme that is pre-defined and all images in the series will revolve around that theme. Some series are created deliberately, some are collections of works that take years or decades to develop and are pulled from a photographers body of work as a definitive series collection. Check out the examples and links below:

Example: Photo Series from a body of work:
Take for instance 
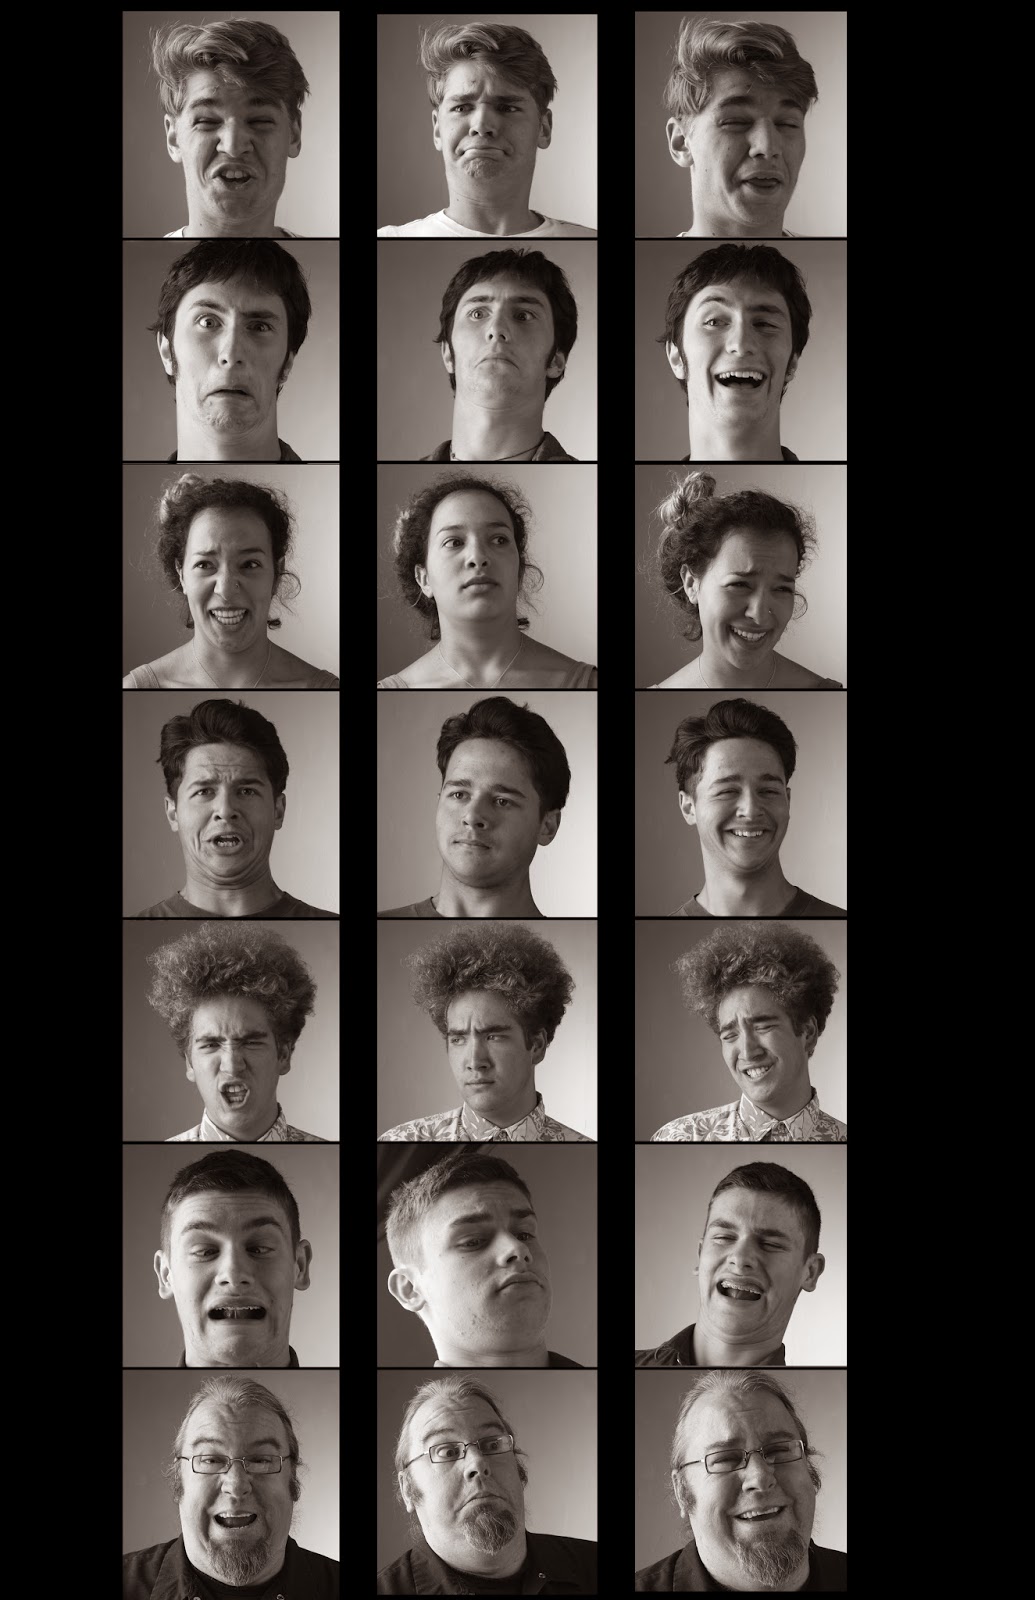
Philip Halsman, famous portrait photographer who shot everyone from Albert Einstein to Marilyn Monroe. After a photo session with the Ford family he asked one subject to jump for his camera, soon he began to ask other subjects to jump for his camera at the end of their photo sessions, and so began the creation of an important photo series of celebrities jumping. Halsman released a book entitled "Jump" in 1959. Halsman believed that even the most stoic photo subject might be able to hide behind a stern facade, but that their true face is revealed when they are jumping.
Then Future president Richard M. Nixon. (Copyright Philippe Halsman Estate)
Example: Photo Series as Visual Cultural Anthropology:
As another example of a photo series consider the work of Photographer Ari Versluis and profiler Ellie Uyttenbroek. They have been working to document the distinct styles in their hometown of Rotterdamn and elsewhere. Often shooting subjects they find on the streets, this pair find individuals that follow a distinct dress/lifestyle and shoot them in consistent poses and arrangements in order to show the similarities among these unique individuals. They call their body of work "exactitudes", a mix of exact and attitude. Their work is so exacting it is essentially a display of visual cultural anthropology, a documentation of the styles that are heralded as unique, but how unique are we really? Their work brings into question the very idea of that value that we hold so high... individuality.


Other Photo Series to Explore for Inspiration:

Photo Series Assignment:
  • Create a photo series that follows a theme
  • Shoot as many examples that you can as long as they fit into the theme, there is no maximum limit
  • Create enough images to have a strong series, 3 or 4 examples will not suffice, the final result should be impressive and follow a central or underlying theme. Strive for 10 strong examples of your theme
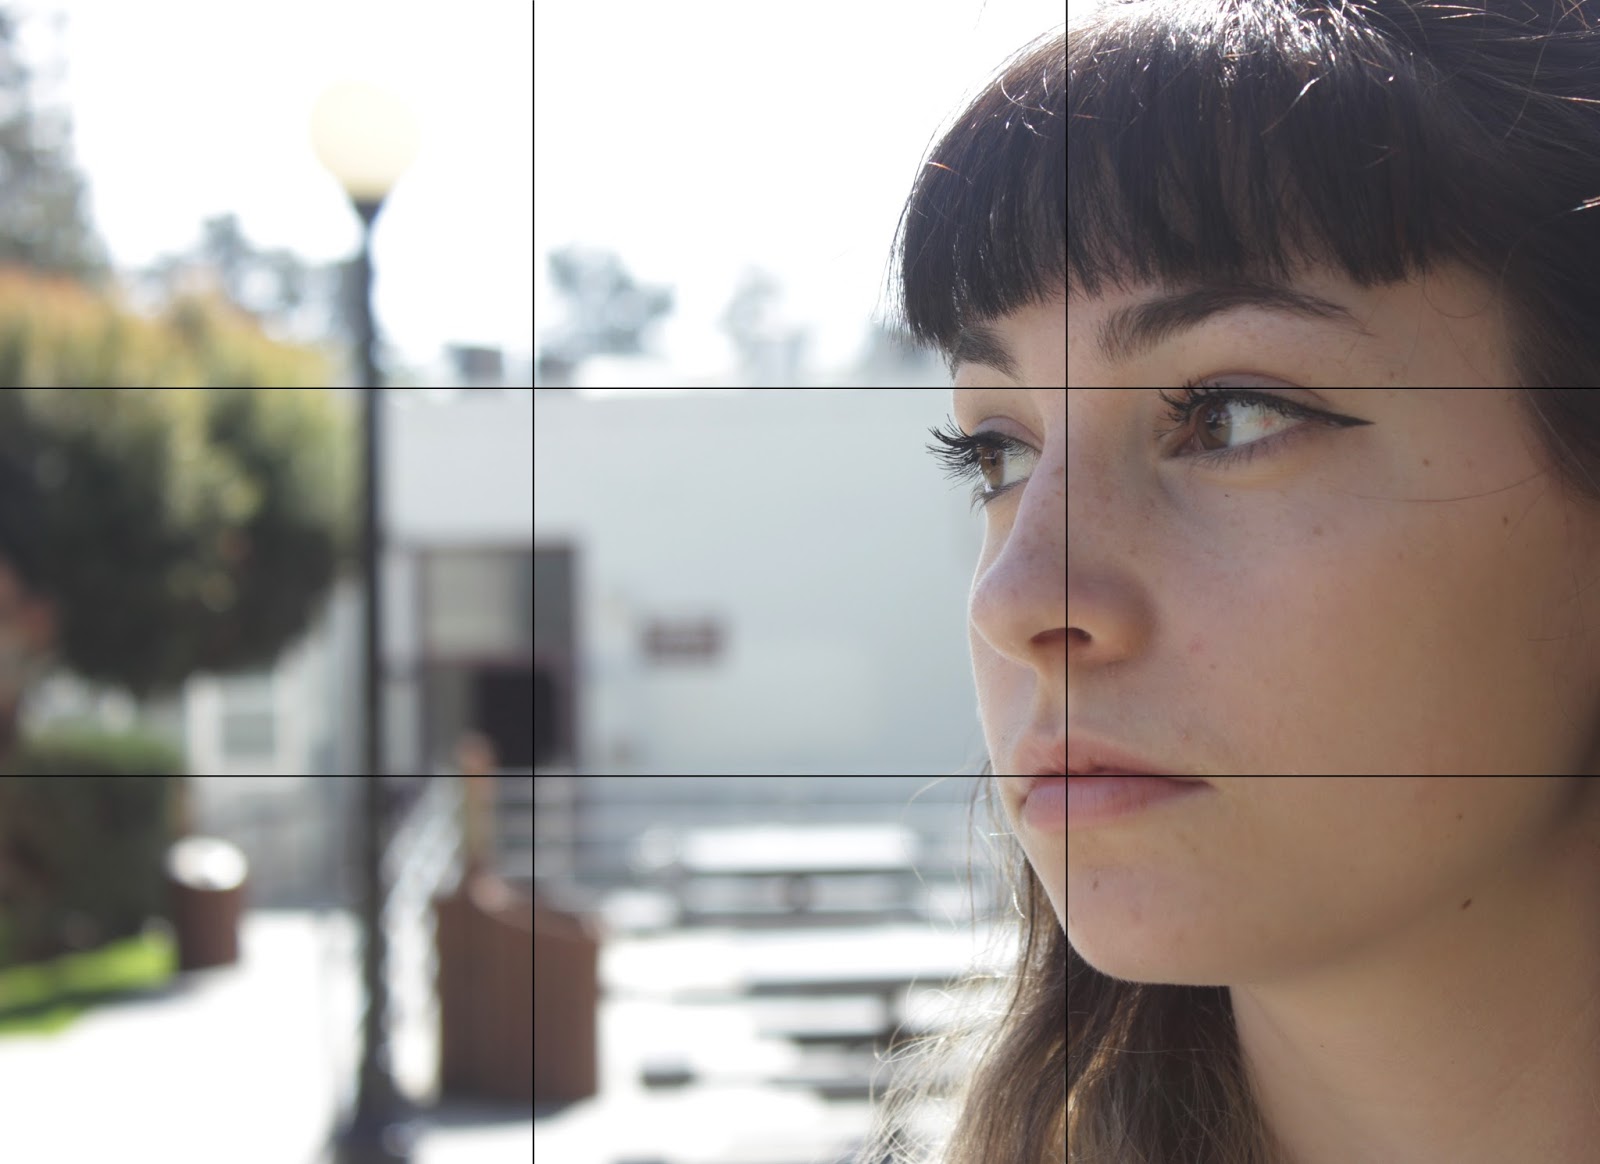
  • Images must be properly exposed, composed and show creativity
  • Post processing is allowed, however most of the work done to the image should be done before the shutter is clicked...dial in your exposures first, post process to enhance, not fix errors in exposure
  • Series concept must be approved before work begins
  • Create a powerpoint or keynote presentation for your project to display your images during presentation to the class. During the presentation be prepared to discuss your work, concept and how you achieved your results. Be prepared to discuss the themes involved in your work and how you translated your concept into imagery, what is the deeper meaning behind your work if there is one? Is your work a commentary or observation, what does it mean to you?
"Meme yourself" Photo series by Seth Wilson 2013
All work is due June 8th,

Have fun! - Mr.W

Thursday, February 15, 2018

New Project: Keepin' It Surreal!

Hello Students,
Your newest assignment is an exercise in surrealism. You must pre-plan your image with a few pencil sketches so you can plan and shoot all the elements you need. Post processing is acceptable and encouraged, you can use all the software tools available to you to achieve the final image you have in your mind.

"To be a surrealist... means barring from your mind all remembrance of what you have seen, and being always on the lookout for what has never been." - Rene Magritte
"My idea of a perfect surrealist painting is one in which every detail is perfectly realistic, yet filled with a surrealistic, dreamlike mood. And the viewer himself can't understand why that mood exists, because there are no dripping watches or grotesque shapes as reference points. That is what I'm after: that mood which is apart from everyday life, the type of mood that one experiences at very special moments."- Ian Hornak

What is Surrealism?
Taken from the Heilbrunn timeline of Art History: "Surrealism originated in the late 1910s and early '20s as a literary movement that experimented with a new mode of expression called automatic writing, or automatism, which sought to release the unbridled imagination of the subconscious. Using Freudian methods of free association, their poetry and prose drew upon the private world of the mind, traditionally restricted by reason and societal limitations, to produce surprising, unexpected imagery. The cerebral and irrational tenets of Surrealism find their ancestry in the clever and whimsical disregard for tradition fostered by Dadaism a decade earlier. The visual artists who first worked with Surrealist techniques and imagery were the German Max Ernst (1891–1976), the Frenchman AndrĂ© Masson (1896–1987), the Spaniard Joan MirĂ³ (1893–1983), and the American Man Ray (1890–1976).

Surreal Image by Seth Wilson 2018. "Portrait of Kel Varnsen, District #3".


Keep It "Surreal" Assignment:
  • Research surreal art, artists and photography for inspiration
  • Brainstorm a few ideas and create a full page pencil sketch of your idea. Try to think of all the visual elements you would like to incorporate... consider setting, backgrounds, models, objects or props, costume, stylistic effects. Plan every detail of your shoot for best results. I expect QUALITY work.
  • Begin shooting your photo(s) and use photo manipulation to achieve your desired look with Photoshop
  • All processes are available to you, cropping, fine edge selection, airbrushing, colorization, layering, enhancement effects etc... try to achieve a worked over and artistic look to your image
  • Post your image to our flickr page when complete


Image by Gala Darling
This photo was shot live, no amount of post-processing or Photoshop has been used to achieve this effect. It took 26 attempts and 5 hours. Philip Halsman would count to four, where Dali would leap into air, and three assistant will throw the cats, another will throw a bucket of water, and Mrs. Halsman held the chair.

Student Work Examples:


Thursday, February 1, 2018

New Project: High Dynamic Range Imagery (HDRI)

Hello Students,
Your new assignment is to shoot a set of "bracketed" images and combine them with Photoshop's "Merge to HDR Pro" feature. HDR Pro is a powerful tone mapping program, and is the best way to merge multi-exposure images. Bracketing refers to shooting images in multiple exposures, normal, over and under exposed... which are then combined to show a greater depth of light, a higher dynamic range... of color, light and dark.

Project Requirements:
• You will produce 4 final images for this project, 1 landscape, 1 architecture, 1 still life, 1 automobile
• You must use a tripod to shoot a set of multiple exposure images. and then combine them with the Merge to HDR Pro feature in photoshop. Take 3 different exposures, underexposed, normal and overexposed. 
• Use the custom slider in the HDR Pro interface to dial in your image and make it look awesome!
• Post your final images to the flickr account when complete


Tips and Advice to get great results:
  • Subject matter is your choice, but avoid any portraits or any subject that will move between taking each picture. Only attempt portraits if your model can stay perfectly still for all exposures. otherwise there will be ghosting and blur in your image.
  • HDRI process works best with landscapes, cars, architecture and objects that have rich texture or very shiny surfaces, like cars. 
  • HDR Pro can align your images, but if there is too much movement between exposures than results can be less than desirable. 
  • Use a tripod, it is mandatory for this project!


How To Merge with HDR Pro in Photoshop CS5:
AKA: Tone Mapping

  • Take your 3 different exposures and place them in a new project folder
  • Launch Photoshop and go File > Automate > Merge to HDR Pro
  • Browse to your files and load all 3

  • Merge to HDR Pro launches
  • Input the Shutter Speed, Aperture and ISO for each exposure

  • Modify the sliders as outlined below to achieve your best look
  • Check out the Presets at the top for your other 3 versions


Setting Camera Up for Bracketing:
Menu > Camera  >Bracketing > AE Bracketing > Choose exposure


Merge to HDR Pro Slider Functions Explained:
Edge Glow:
Strength <--- Increase these numbers for more halo effect, decrease for less
Radius <--- Increase these numbers for more halo effect, decrease for less

Tone/ Detail
Detail <--- Sharpens your image and adds contrast, ADJUST THIS FIRST then adjust others.
Exposure <--- Increases or decreases brightness
Shadow <--- brighten or darken shadows
Highlights <--- brighten or darken highlights

Color:
Vibrance  <--- Adjusts muted colors first, then others
Saturation <--- removes or adds more color


HDRI Examples:


This represents the "base" or standard exposure for our HDRI process...

This is the over exposed image, used for highlights and reflections...

This is the under exposed image, used for shadows in the HDRI process...

This is the final tone-mapped image from the HDRI process. Photo by Seth Wilson 2016.