Thursday, October 5, 2017

New Assignment: Rule Of Thirds

Rule Of Thirds Project Details:

A detail from the Tilden Park Carousel in Oakland Ca. Photo by Seth Wilson
Your next assignment is to compose 4 different images that demonstrate the rule of thirds. Your images must be properly lit, have the right levels of exposure and must be in focus. You must apply the Rule Of Thirds to each images composition. Try to compose your image in camera, and only crop your image if needed. These must be new images, not previous work examples.

You can shoot any subject you like, such as landscape, portraiture, still life, pets, architecture... but each of your 4 final images should be different subjects. 

You should shoot many images and choose the best... on average you should shoot about 15-20 shots and choose the single best example from each set.

Assignment Deliverables:
1- Four images that demonstrate the use of the Rule of Thirds in their composition. Each image must be a different subject matter, the subjects could be landscape imagery, portrait, still life etc. Take many photos of each subject and post your best.

2- Written Synopsis of the Rule of Thirds as you interpret it. Write a short description of this principle and how you used it in your images. Tell me what/where the focus point in each image is... where is the eye drawn to? Include these details in each image posted.

Grading:
  • Your work will be evaluated on its ability to demonstrate this principal in a creative and informative fashion and to meet all deliverables on time.
  • Image enhancement (color, B&W, color tweaking) is allowed as long as it enhances and does not detract from clearly demonstrating the principal. 
  • These images must not be over or underexposed and must be in focus. Use a tripod to ensure a jitter/blur free image.
  • Your images must demonstrate proper exposure techniques
Deadline:
This assignment is due at end of next weeks class.

Links:

Student Work Examples:


Have fun with your new assignment!

  - Mr. W

Thursday, September 21, 2017

Key Assignment 3: Static and Dynamic Composition

Hello Students,

To further our comprehension of photographic composition we will strive to develop an understanding of  the use of static and dynamic compositions with attention paid to creating a center of interest.

To summarize, static composition means that the majority of he lines and elements in the frame are horizontal or vertical. Theory dictates that the horizontal and vertical lines have a calming and soothing effect on the observer. Static compositions can be symmetrical or asymmetrical.

Conversely dynamic compositions occur when the elements in the frame are arranged in diagonal lines, which can have the effect of being somewhat unsettling on the observer. Dynamic compositions can denote movement, energy, excitement, vibrance.

To paraphrase: when the primary line of movement is horizontal or vertical the composition is static. When the primary movement is diagonal the composition is dynamic.

When it comes to composition each photo should have only on principal idea, topic or center of interest to which the viewers eyes are attracted. Subordinate elements within the picture must support and focus attention on the principle feature so it alone is emphasized. A photo without a dominant center of interest or one with more than one dominant center of interest is puzzling to the observer. Strive to frame your composition with a dominant "point of interest".

Key Assignment 3 - Static and Dynamic Composition:

Part 1: Create a series of static compositions that emphasize a point of interest, with other elements maintaining a supporting or subordinate roll 

Create 2 static photo compositions: Still life and portrait

  • Create a still life of objects found in your home and arrange them into a static composition. Focus on creating parallel planes through the use of space between your objects while maintaining emphasis on a dominant subject
  • Create a portrait of 2 people and pose them into a static composition. Pay attention to light, background, foreground and strive to emphasize vertical and horizontal alignments while maintaining emphasis on a dominant subject


Create 2 static photo compositions: Landscape and architecture
  • Create a landscape photo showing natural features in your local area framed as a static composition. Strive for horizontal and vertical lines and elements while maintaining emphasis on a dominant subject
  • Create a static photo composition using local architecture. Strive for horizontal and vertical elements while maintaining emphasis on a dominant subject


Part 2: Create a series of dynamic compositions that emphasize a point of interest, with other elements maintaining a supporting or subordinate roll.

Create 2 dynamic photo compositions: Still life and portrait
  • Create a still life of objects found in your home and arrange them into a dynamic composition. Focus on creating parallel planes through the use of space between your objects
  • Create a portrait of 2 people and pose them into a dynamic composition. Pay attention to light, background, foreground and strive to emphasize vertical and horizontal alignments

Create 2 dynamic photo compositions: Landscape and architecture
  • Create a landscape photo showing natural features in your local area framed as a dynamic composition. Strive for diagonal lines and elements, or elements to recede or advance to create a diagonal compositionwhile maintaining emphasis on a dominant subject
  • Create a dynamic photo composition using local architecture. Strive for dynamic angles while maintaining emphasis on a dominant subject
Part 3: Written Essay

Write 3-4 Paragraphs about your images and attempt to cover these topics in your essay:

  • Explain how your static images achieve composition
  • Explain how your dynamic images achieve composition
  • For each image describe the dominant element or point of interest
  • Describe how the subordinate elements support the dominant elements in each image
  • For each image describe at least 2 elements or principles of art that or being utilized, or any other compositional concept
  • Post your essay with your favorite image

Due by next Thursday...


Student Examples: Static


Student Examples: Dynamic


Thursday, September 7, 2017

Key Assignment 2: Principles and Elements of Art and Design in Photographic Composition


Art and design elements are the basic units or building blocks of a visual image. The principles of art and design govern the relationships of the elements used and also organize the composition of a visual image as a whole. All imagery, art, design and photography alike, are comprised of elements that can be broken down and analyzed.  Look over these posters, the first addresses the principles, the second addresses the elements and provide visual representations for examples of these concepts. Continue scrolling down for written explanations in more detail. Your second key assignment utilizing this knowledge is listed below...


The Elements of Art and Design
Space: Space refers to the distances or areas around, between or withing components of an image. It can exist in two or three dimensions. Space can refer to positive space(a shape, such as an apple) or negative space (the absence of an apple shape). It can also refer to elements in the foreground, mid or background of an image.

Line: Line is the basic element and refers to the continuous movement of a point along a surface, such as a pencil or brush. Line can also be created by the edges of other shapes. Lines can vary in length, thickness and direction. Line can create style, texture and varying levels of definition or emphasis.

Balance: In the sense of "visual weight" Balance can either be symmetrical or asymmetrical. The balance of an image can affect the focal point of an image. The location of objects, their sizes and colors, textures and shapes all affect the perception of balance in an image. Think of shapes. colors, textures and type as having a "visual weight" and use that sense to "feel" out your design.

Color: Color and particularly, contrasting color is used to draw the eyes attention to certain areas. It can invoke mood and emotion. Color is created in many different ways... but in all color spectrums, there are primary colors, which all other colors are derived from, and secondary and tertiary colors. Certain formula’s exist for choosing colors that are pleasing to the eye, one way is using Complimentary Colors, which appear opposite each other on a color wheel. Colors can be perceived as “Warm” such as reds, yellows and oranges, other colors are “Cool” such as purples, greens and blues.

Shape: Shapes are what give objects their definition. Think of the silhuoette. Shapes can be organic (curved, soft, random) or geometric (angular, sharp, organized, complex).

Texture: Texture is perceived surface quality. In art two types of texture exist, tactile and implied. Tactile texture is the way a surface actually feels, such as sandpaper or tree bark. Implied texture is the way the surface of an object “looks” like it feels. This is created with different pencil and brush techniques. In the modern digital realm, texture is a strong ally in design.

Value: Value is an element that refers to the relationship between light and dark. It can also be referred to as tone or shading. The value of an object helps give it form and depth. 

The Principles of Art and Design
Unity: Unity refers to a sense that everything in a piece of work belongs. It can be referred to in the literal sense of course, or just by the way balance, repetition and other elements acheive a design harmony.

Variety: The use of dissimilar elements. Differences in shape, texture, color, line etc.

Repetition: This refers to the recurrence of elements within a piece. Color, lines, shapes and other elements can be echoed, often with some subtle variation to maintain interest. Repetition can be random or organized, or express rhythm and patterns.

Harmony: Harmony is acheived through the sensitive balance of variety and unity. Harmony in color can be acheived by using complementary or analagous colors. Harmony in design is reflected in consistency in style, similarity of components. Harmony can also extend to the use of texture, color, scale etc.

Contrast: Contrast is the occurrence of differeng elements, such as color, value, scale etc. It creates interest and helps direct the focal point. Contrast helps define depth and space as well. Objects that are closer to use appear lighter, and objects that are farther away often appear darker.

Proximity: This refers to the physical placement of objects or elements in a piece. Proximity is used to communicate ideas like relation, importance or hierarchy.
Proportion: Proportion involves the relationship between objects. It is relative to size and scale. Proper proportion is important in implying realism, and skewing proportion can force the viewers perspective to change. One classical expression of proportion is the “Golden Ratio” in mathematics and the arts. Throughout history, the ratio for length to width of rectangles of 1.6 (roughly) has been considered the most pleasing to the eye. 


This image is at least 6 different principles and elements of art, can you define which ones?
Photo credit: Seth Wilson 2015 "Faire Apples" 
Key Assignment 2 - Explore the Principles and Elements of Art and Design Through the Lens of Photography:
For this assignment you will capture images that demonstrate and emphasis the principles and elements of art and design. You will also present them as a 2 separate photo grids with a short essay describing how each element or principle is being demonstrated.


Simple photo grid created with Fotor. Photo credit: Seth Wilson 2015
Assignment Part A: Capture and Composite Images that Demonstrate Principles of Art Design
  • Capture 7 different photos that demonstrate the following principles of art and design:
    • Line
    • Shape
    • Form
    • Space
    • Color
    • Value
    • Texture
  • Arrange the photos into a grid using photo editing software such as photoshop or lightroom. If you don't have access to that software you can download and install Gimp for free, an open source image editing program, or utilize a simple browser based photo editing website such as Fotor.
  • Write at least one sentence that explains each principle and how they are demonstrated or utilized in their corresponding images (You can post the  image to the class Flickr group and attach your essay to the image details or add it as a comment).
Assignment Part B: Capture and Composite Images that Demonstrate Elements of Art Design
  • Capture 9 different photos that demonstrate the following principles of art and design:
    • Balance
    • Harmony
    • Rhythm
    • Movement
    • Emphasis
    • Contrast
    • Variety
    • Unity
    • Proportion
  • Arrange the photos into a grid using photo editing software such as photoshop or lightroom. If you don't have access to that software you can download and install Gimp for free, an open source image editing program, or utilize a simple browser based photo editing website such as Fotor.
  • Write at least one sentence that explains each element and how they are demonstrated or utilized in their corresponding images (You can post the  image to the class Flickr group and attach your essay to the image details or add it as a comment).
This assignment is due and must be ready for review and critique by the next class meeting...

Wednesday, August 23, 2017

Welcome Photo Students

Hello Students,
Welcome to the Santa Cruz County Regional Occupational Program's online/in-class digital photography course. In this course we will be studying exposure principles, composition, studio lighting, portraiture and creation of a photo series and essay.

Your Instructor, Mr.Wilson
Classes will meet in-class 1 day a week for hands-on exercises and course work discussions, review and critique. Students will have access to class equipment during meeting days but will be required to use their own cameras, computers and internet access to complete online assignments each week. Students must provide transportation to and from class during in-class days. Students will post work and complete discussions on the course flickr group. Students will need a yahoo account to post work.

Students should check in with this website for new assignments and will post work for review, critique and grading online.

Introduction Assignment:
For this first assignment students will introduce themselves on the class Flickr group with an artistic image and an introduction.

Assignment Details:

  • Create or utilize your Yahoo email account to sign up for or log into Flickr
  • Request to join the class Flickr Group Page and wait for approval
  • When access is granted navigate the the group page and upload your artistic image to the Photo section, make sure your image is tagged with the word: artistic
  • When your image is uploaded navigate the the group Discussion area and type in your introduction to the post titled "Group Introduction Page", you will find instructions for completing your introduction in the first post written by me, your instructor.
Photo Credit: Seth Wilson 2015 "Blue Moon"

Key Assignment 1: Pareidolia and Balance
Your first key photography assignment is a study in pareidolia. Pareidolia is the perception or recognition of a specific pattern or form in something that is essentially different. In this case we will be looking for faces in objects or faces in everyday places and buildings/architecture. When an artist uses elements of pareidolia in a painting or illustration it can have a double-meaning. In photography the same effect can occur if the photographer sees the right conditions for it. Check out the samples below...

Pareidolia Photography Exercise:
  • Walk the campus, your neighborhood or home looking for hidden faces in buildings, plumbing, fixtures, bookcases, trees, etc... capture the images with attention being paid to composition, lighting, color, angle, emotion and most importantly balance.
  • Take many shots (10-20) and choose your 4 best.
  • Post your 4 images to the Flickr group with the tag pareidolia (spell it correctly!)
  • For each image you post write a short paragraph describing what emotion your pareidolia displays (happiness, fear, rage, etc...) and why. Include these paragraphs in the details section when posting your image.
  • Project is due wednesday

Reading Assignment:
Complete this reading assignment in order to be able to identify the types of balance used in your and others photographic compositions. Identifying balance in your work is part of the assignment requirements.

Link 1: New York Film Academy -  5 types of balance in photography
Link 2: Photography Life - Balance in photography

Writing Assignment Exercise:
  • After reading the 2 articles linked above, look through online photo galleries or even your own images and cite 1 example and what kind of balance they are demonstrating. Search for an image that you think has visual interest in it's composition.
  • Provide a link to the image itself in your post in this exercises discussion area on the course flickr page.
  • Write a description of the type of balance being demonstrated with your image and why you chose it as an example in your discussion post.
  • Exercise is due wednesday

Grading Specifications for a total of 10 possible points:
      2 points: All 4 shots posted with descriptions
      2 points: All 4 shots are properly exposed
      2 points: All shots show attention to balance, composition, light, exposure
      2 points: Writing exercise completed
      2 points: Work posted on time

Have fun!

- Mr.W

Thursday, May 11, 2017

Color Channel and Blending Mode Manipulation

Hello Students,
Fine art photography and experimental photo techniques like infrared photography can be created with Photoshop to expand your ability to use digital photo manipulation for creative expression. Part of the key to tapping into the power of photoshop is understanding Color Channels, and how layers can be manipulated with Blending Modes. In this project you will convert your Color Channels to Layers filled with the colors of your choice, and then experiment with different blending modes. The results will be surprising. The idea here is to be creative and try to achieve an artistic exposure effect. Essentially replacing the standard RGB values with your own values/gradients/images etc. Next we will follow a tutorial to create an "Infrared" photography effect.
Digital images are created with 3 channels of color, Red, Green and Blue. You will convert the color channels in your image into colored layers, and then manipulate them with blending modes.
This image was separated into color layers in PS and the blue layer was replace with a blur orange gradient

Experiment with filling red layers with blue colors, or green with yellow and then changing the blending modes.  In this image I used a Gradient to achieve my desired effect of drawing the eye into the center of the flower couples with blending mode to enhance the effect.


Channel Mix - Color Channel and Blending Mode Experimentation Assignment:
To set up a color mixing experiment you will convert color "Channels" to color "Layers". Follow the steps below, arrange your layers and explore blending modes for a creative effect. When complete post your photo and move onto the Infrared tutorial:
  • Open a photograph of your choice. Chose a photo that shows rich colors.
  • Open Layer palette and Channels Palette side by side
  • Select Red Channel to view that channels value in greyscale
  • Command-Click the Red Channel Icon to turn it into a Selection
  • Click on the RGB Channel to restore to full color
  • Make a new layer, click your Color Icon and create a new Layer. Fill that Layer with Red.
  • Hide that layer and repeat that process until you have a layer that represents each color in the Color Channel, Red, Green and Blue

Your Layer Palette should look like this when complete. You can change the white layer for a black one to achieve different results
  • Create a layer of white and place behind your Red, Green and Blue Layers
  • Change the Blending Mode of the top Layer until you find a desirable result
  • Continue changing blending modes and re-arranging color layers and save 3 different versions that you find artistically pleasing
  • Repeat this process with a second image of your choice and upload to the flickr page
Original
Mixed Channels
Infrared Photography Tutorial:
Infrared photography is a way to see a spectrum of light that isn't visible to the human eye. It requires special filters, methods and sometimes equipment modification.

In this exercise you will create an infrared effect with your own image using Photoshop. Follow the steps below or read the tutorial link to complete your own example. Compare your results to the example below, are they similar in effect? Make sure you follow the steps carefully:
  • Open your image and duplicate the background layer, relabel it "infrared".
  • Open the Channels Palette and click on the green channel, your image will appear black and white, this is the color "data" for the green channel. An RGB image has 3 channels to make a single color image.
  • With the green channel selected, apply a Gaussian Blur to the Green Channel. The Gaussian Blur Radius can be set to about 35 pixels.
  • Change the Blend Mode of the infrared layer to "Screen".
  • Add a Channel Mixer Adjustment Layer, set the Red value to -50, the Green value to 200 and the Blue value to -50.  Also make sure the Monochrome checkbox is checked. 
  • Lower the Opacity of the infrared layer to 35%.
  • Add a new blank Layer to the top of your layer stack and fill the layer with white. Change the name of this layer to "Grain"
  • Apply a "grain" effect by using the Add Noise filter under the Filter Menu / Noise.
  • Change the Noise layer Blend Mode to "Multiply".
  • Duplicate the background layer and place it between the Grain layer and the Channel Mixer layer and lower it's opacity to 50%.
  • Save a JPG and post after you make any final adjustments, compare your results to the one below.
Photo before processing. Fall Creek, 2015. Photo by S.Wilson

Photo after Infrared process with Photoshop using blending modes, filters and adjustment layers.


Have fun!

- Mr.W

Thursday, April 20, 2017

Rule Of Thirds Field Mission

Hello Students,
Your new assignment is a field mission utilizing the rule of thirds. Details are below.

Rule Of Thirds Field Mission:
Create 10 Photographs using the rule of thirds. You must properly compose, expose and capture pictures of the following subjects:

Subject Specifications:
  1. A person facing the camera, portrait closeup
  2. 2 people framed in the camera
  3. A group of 3 or more people
  4. A closeup image of someones hand/hands doing something (drawing, digging, making)
  5. A still life of found objects
  6. A landscape view
  7. A tree, flower or other natural element
  8. An architectural element
  9. Something shiny and new
  10. Something old and decayed
Assignment Specifications:
  • Shoot at least 10 images of each subject to obtain the best composition, exposure and quality. Post the best version of each.
  • You may shoot with any mode as long as your image is exposed correctly.
  • Using Photoshop, crop your photos appropriately if you need to.
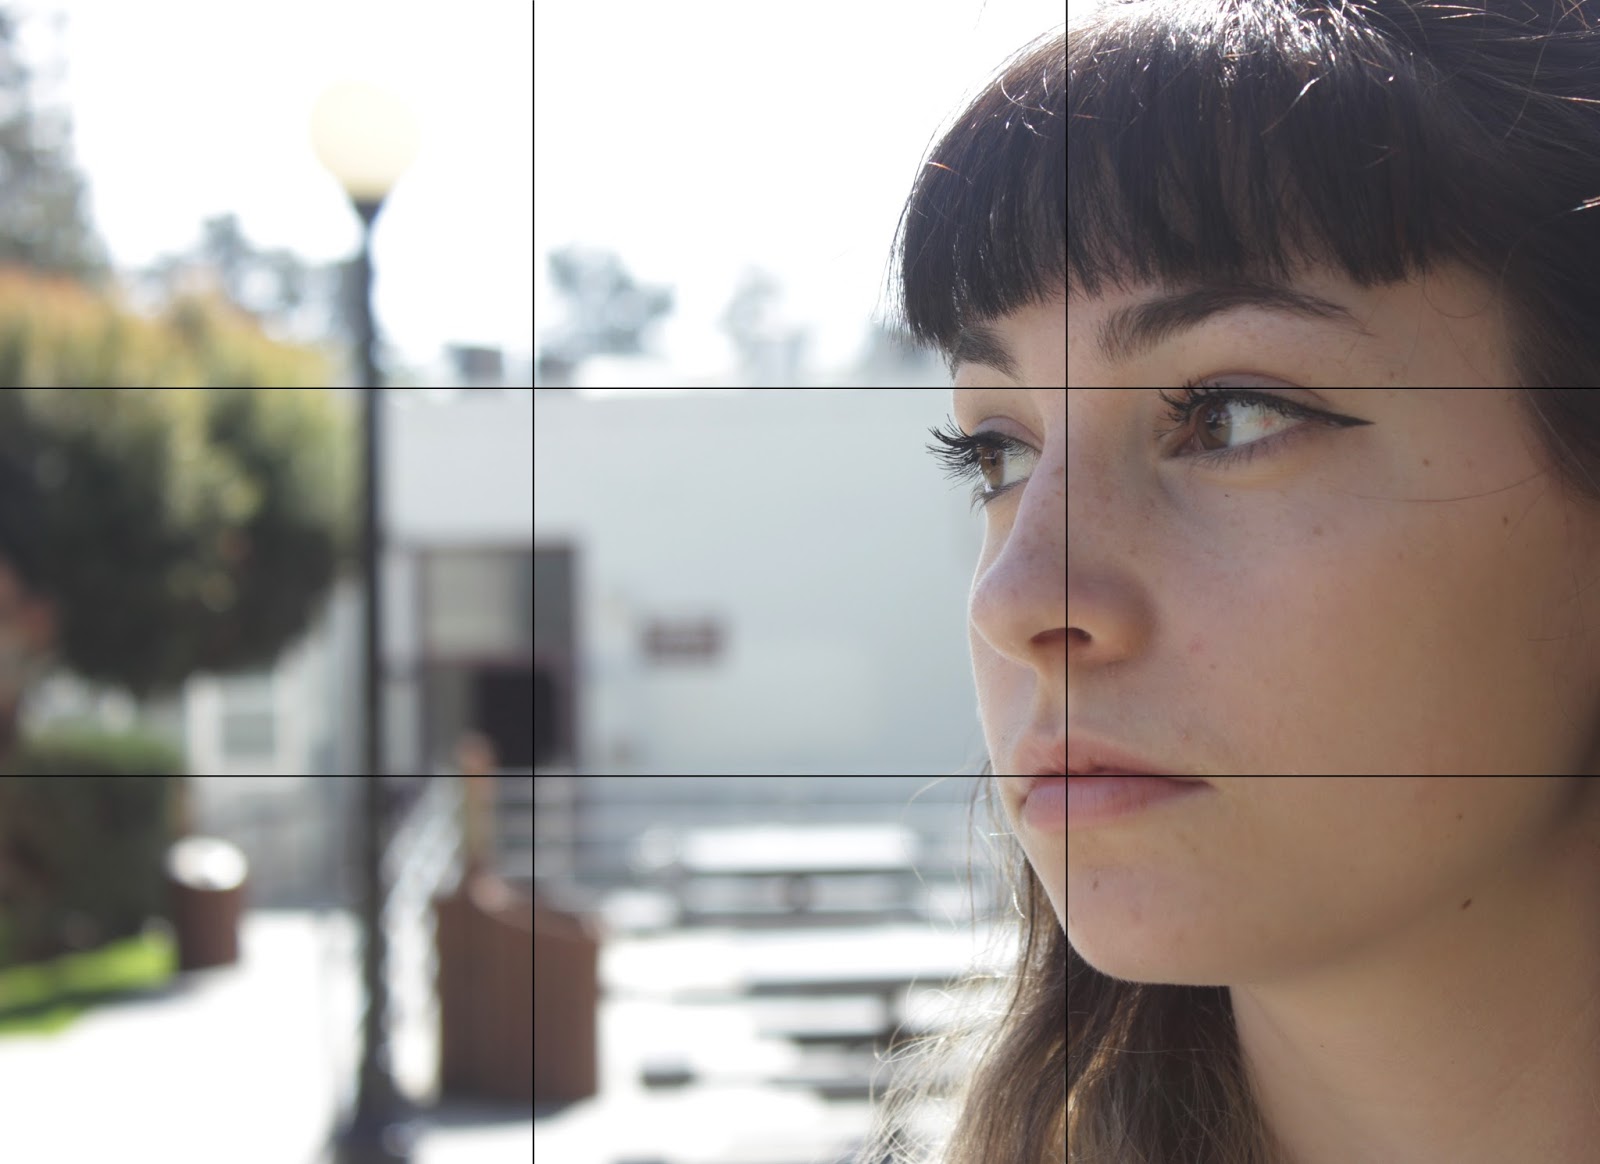
  • Choose 3 of your best images and overlay a rule of thirds grid on top. Use the line tool or pencil tool to draw the simple grid. Screenshot and add your EXIF data of each final image to confirm manual mode.

To See A Rule Of Thirds Grid in Photoshop:
  1. View > Show > Grid
  2. Go to Photoshop > Preferences > Guides, Grids and Slices
  3. Set: Gridline to 33.3333 Percent
  4. Set: Subdivisions to 1
  5. This will show the grid, you will need to "draw" the grid on your image is with the line/pencil/brush tool and use as color that will show up against your image with good contrast.
  6. Save an alternate version of your file so you have 3 examples with and without the R.O.T. grid.

Student Work Examples:


Have fun! - Mr.W

Thursday, April 13, 2017

Invisible Camera Self Portrait

Hello Students,
Your next photo challenge is to replicate the effect in the photo below. The concept is to create a self portrait, taken in a mirror, where the camera is hidden through photoshop trickery. I loved this technique so much that years ago I emailed Josh Dunlop and asked his permission to use his photo below and challenge my students to replicate his method, fortunately for us he loved the idea.

This high performing student example shows good technical skill and attention paid to lighting and exposure

Assignment:
Check out his image below... how do you think it was created? Follow this link and try to replicate the process. With some additional searching you can find more resources on the steps required to replicate the effect.

Tips:
  • Follow the steps on the expert photography website to create your own invisible camera self portrait
  • Take a few practice shots against the mirror to make sure you are exposed properly and in focus
  • Lock down focus/white balance/iso/shutter speed so your shots can be blended together in photoshop
  • Think about how you can use creative photography methods to make your own "hidden camera portrait" unique...  think about color, setting, attire, extras (other people), mood, lighting, color or b&w, image enhancement, etc...
  • Read and study the methods used, if your first attempts aren't successful, try again...

Photo by Josh Dunlop at ExpertPhotography.com
Have fun!

 - Mr.W