Thursday, November 16, 2017

Principles of Exposure: ISO and Noise

Assignment: Understanding ISO
Students, your new assignment is a challenge for you to demonstrate an understanding of ISO and how to adjust both Aperture and Shutter Speed to maintain proper Exposure across multiple ISO settings. In this assignment you will find a still life subject, and shoot 4 images that have similar exposures but increase in ISO. Little change should be seen in light/dark values, only additional grain/noise should be noticed as increasing. Overlay your images as shown below and document your exposure settings.


Notice the increase in shutter speed and decrease in aperture size that was required to maintain exposure levels across the 4 iso ranges
Reading and resources for deeper understanding:
Lightstalking: The Rule of Equivalent Exposure
Exposure Calculator 


Assignment Deliverables:
Part A:
  1. Produce a series of images (4) that demonstrate the impact that ISO has on the noise in an image while maintaining consistent exposure. Choose a creative still life subject and produce 4 images showing the range of ISO settings from low to high. Mimic the ISO Comparison images above. You will need to adjust either shutter speed or aperture to keep even exposure, don't let the different examples get darker or lighter.
  2. Compile the images in slices to show the even exposure levels, as illustrated above


Part B: 
  1. Written Synopsis of the Exposure Principals. Write a short 3 paragraph description of the three principals of exposure, shutter speed, aperture and iso, what they mean and how you utilize them in photography. 
  2. Email your essay to the instructor for credit


- Due following thursday
- Mr.W

Thursday, November 9, 2017

Principles of Exposure: Aperture, depth of field and focus

Exposure: Aperture
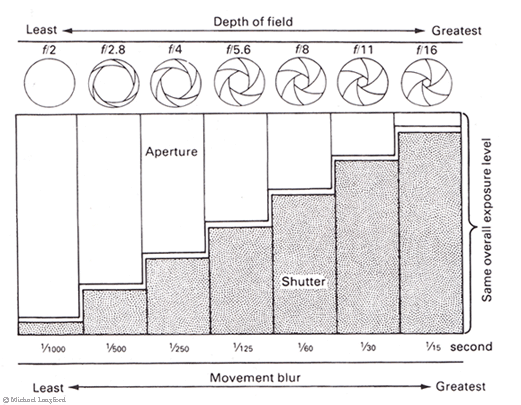
Notice in this chart that the wider apertures have a narrow DOF, while the smaller aperture has a larger DOF. Additionally the shutter speed must be sped up or slowed down depending on aperture setting.

Aperture is a mechanical feature on the camera lens that adjusts the amount of light that is let into the camera. The size of the aperture also changes the depth of field range, a term for the area of an image that is in focus. 


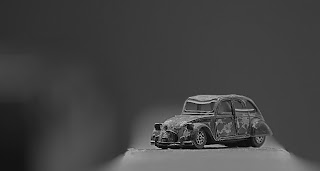
A larger aperture will create a narrow depth of field and allow the maximum amount of light in the camera, so a faster shutter speed may be used. This is great for artistic images, street photography, portraiture and still life. The depth of field can be very slim with a wide open aperture resulting in more emphasis on the subject.


A smaller aperture is used when the depth of field must be wider. This also allows a sharper image to be captured because the flatter part of the lens is being used... resulting in less distortion fringing of details. Great for images that need increased detail, landscapes, nature photography, architecture.


When a smaller aperture is being used to control depth of field, adjusting the focus on the lens can change the position of the DOF. You can move the DOF closer or farther away. Many lenses will focus automatically, but you can disable that to adjust the focus yourself.


Our artistic element of the week is "Value". Value refers to the tonal quality of an image, tonal quality is, IMHOP best evaluated through a black and white image. If you shoot in black and white or experiment with black and white conversion with an image editing program, you will learn to see opportunities for good value in b&w photography. Good tonal quality should show as many levels of value as possible, from bright to dark and everything in between.

Key Assignment 6: Aperture and Value
Students, your new assignment is to develop an understanding and demonstrate control of depth of field. Additionally we are focusing on value in photography by shooting black and white imagery

Assignment Deliverables:

1- Depth of Field Portrait: Create 2-3 portraits that demonstrate depth of field. Use a wide open aperture setting and look for good backgrounds for your subjects

2- Near/Far Focus: Arrange 2 people 10 feet apart from each other. Produce 1 image that shows the subject closest to you in focus, then change your focus to show the subject farthest away from you in focus.

3- Value/Contrast through B&W: Set your camera to shoot in Black and White only. Take 1 photo each day of the week that captures "value". Look for interesting compositions, light, contrast, patterns. You will need to shoot many images and experiment so you can learn to "see" in B&W value. Post your best 5 photos before next class.


- Mr.W